The 15 minute stay-cation with Bodymind Ballwork
 What do you do to take a break from daily stress, body aches, worry and fatigue? Maybe it’s a cup of tea, a phone call with a friend, or a few minutes of yoga. I recommend that you add this to your choices: a Bodymind Ballwork technique for the spine which will de-stress you, lengthen your back, and refresh your breath and your mind. I do it every day, as do many of my students.
All you need is 15 minutes, a clear space of floor and a yoga mat, and two balls. You can use tennis balls, or find various types of massage balls online. The ones I use are 3” solid rubber, but you can use larger ones as well. A smaller firmer ball will give you a deeper massage, and a larger hollow ball will give you a less specific pressure and an overall feeling of stretch. Both are good.
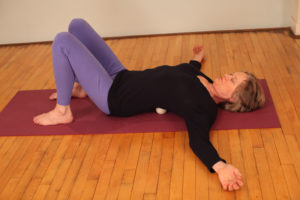
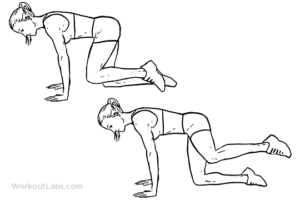
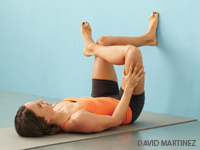
Lie on your back with your knees bent or straight, whichever is more comfortable to you. Spend a few minutes connecting with your breath, and feeling your body and mind – how are you right now? Are there some sore spots, achy muscles, worries, or emotions that are predominant in your experience right now? No judgment or analysis, just observation.
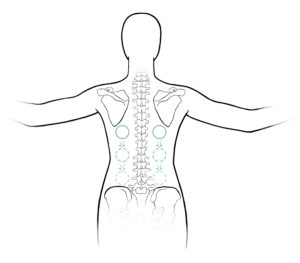
Now place the balls on your mat so that you can lie down with one ball on each side of the spine, near the bottom of your shoulder blades. They can be quite close to the spine, or a few inches away from it. As you first feel the pressure from the balls, you might be surprised at how strong the sensation is, but just give it some time. Let yourself settle, breathing slowly. Your arms can rest to your side on the floor, or you can stretch them overhead and on the floor.
 Now move your back very slowly to one side, just an inch or two. Try to move only that segment of your back where you feel the balls. Breathe as you go, and notice any sensations, strong or subtle. The balls are massaging your spinal muscles, of which there are many, and all the surrounding fascia which is richly innervated. Some areas will probably be sore, others not. Think of it as an exploration of your own self, your back body which you can never actually see, but you can deeply feel.
After moving slowly to one side, and lingering there for a few breaths to give the balls time to do their work, glide back to center again. Then do the same to the other side. After one pass to each side, you can decide to repeat, or move the balls down. I usually go from side to side at least three times at each level of the spine, and more if I have sore spots.
When you are ready, roll yourself to another spot by pushing with your feet, and the balls move down your back an inch or two. Then work this new spot in the same way, slowly moving to one side, back to center, and to the other side. The combination of your body weight and your movement is dissolving tension, encouraging better circulation, and bringing more sensory vitality to all the soft tissue of your back.
Continue to progress down your back one spot at a time, noting the differences in sensation in each spot as you go. Also notice any changes in your breathing, especially when the balls are near your lower ribs. If you’ve had chronic back pain, your breath has surely been affected since the fascia of the diaphragm and back muscles are connected, and the stress of chronic pain can also disturb your breath.
Once you reach the pelvic bones, you can move the balls onto the buttocks and choose any spot to work on. This might lead to another 15 minutes, since most of us carry tension in the buttocks! You can choose to work more thoroughly here, finding several spots to place the balls, or just do one spot to finish your journey down your spine.
When you’re ready to stop, remove the balls from under you, and lie flat. Notice what you feel: what changes have occurred? Is there more ease, a softer and fuller breath, more contact with the floor?
Bodymind Ballwork offers more than 30 techniques, with something for each part of the body.
This technique for the middle and lower back is good to combine with the technique for the shoulders, described in my blog “Release Shoulder Tension with Bodymind Ballwork”, from January 2016.
I have a book in progress that will provide all the instructions, but in the meantime, you can come to class if you’re in New York, or attend a workshop – the next one is at Tasha Yoga in Williamstown, MA, August 11-13, 2017.
Want to learn more? In November 2017 I’m offering a three day intensive where I teach ALL the Bodymind Ballwork techniques in three days (open to anyone, come for a half day, full day or several), and there’s an added 2-day teacher training portion (by application).
Enjoy the summer and take time to renew yourself with Bodymind Ballwork!
 The teams of muscles that support and move your hips are awesome. Even if you’re not an anatomy geek, they are worth getting to know. You have the flexors in the front (with the iliopsoas as the team leader) which bring your leg forward to take a step. Their counterpart is the extensors in the back – gluteus maximus and hamstrings – the push-off muscles for running. We also have teams that rotate the hip joint – external rotators (piriformis being the midget but strong team leader here) and the internal rotators, which I’ll talk about below. Another team is the adductors on the inner thighs, a group of five that stabilize the inner thighs, pulling toward the midline.
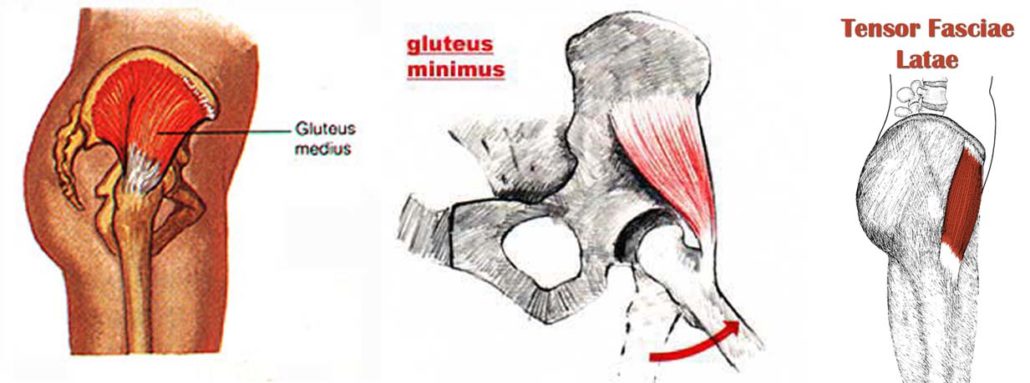
 At the end of a year, we can reflect on the passage of time, reviewing the events and growth of the past year and setting intentions for the next year. It’s a valuable time to renew values and goals, and to savor meaningful experiences. What did I enjoy this year? What do I want to do more or less of next year? What mistakes did I learn from? What obstacles did I overcome, and which ones are still ahead?