Posts

Tiny Habits

Did you make any New Year’s resolution about your physical health? Many people resolve to exercise more, lose weight, get rid of an unwanted habit, or some combination of those goals. But the complexity of life can so easily take over and dislodge even the best intentions.

The other day, I heard an author speak on NPR about how to establish new good habits and get rid of “bad” ones. His name is BJ Fogg, and his book is Tiny Habits, The Small Changes that Change Everything. As you can guess from the title, the trick is to take small steps toward your goal. Instead of resolving to do an hour of yoga a day or taking class once a week, you can set the goal of doing one or two poses each day on your own. Make the “tiny” effort, and you’ll feel the results and probably want to do more.

Instead of approaching a complex chronic pain issue with the pressure of “solving it”, you can explore one small strategy on a regular basis, like doing ten minutes of ballwork, or one targeted stretch or strengthening exercise. Gradually you will gain momentum and your practice will mature.

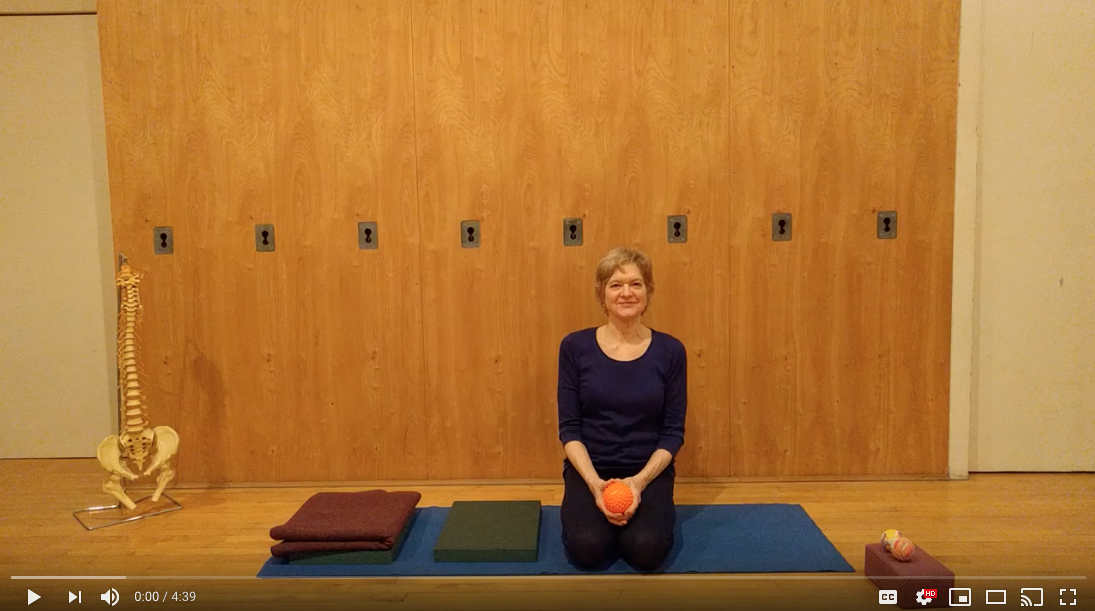
For example, watch this short 4 minute video to experience Bodymind Ballwork and how it relieves tension in your hips, thighs, knees, lower legs and ankles.


The next part of the method is to schedule the activity to give you a daily prompt. Some examples: Right after you shower and get dressed in the morning, you can do some stretches to fully wake up your body and your breath. Or: Right before dinner, you can do a few strengthening exercises, or you can meditate for whatever period of time you have – from 5-20 minutes. As another teacher put it, think “Small, Scheduled, and Specific”. It’ll put you on the path, and once you’re on it, there will be enough to learn and enjoy that you’ll want to continue.

You can join me in NYC any time, every week (Wednesday 12-2) for a class with Bodymind Ballwork and yoga. See the schedule of that and other classes here. I also offer multiple workshops throughout the year in New York and beyond. To see where and when I’ll be teaching, check in often here.

Better Interoception Equals Better Health

How’s your interoception? In case you’re not familiar with that word, it’s the inner felt sense of the body, including being warm or cold, hungry or full, tired or energized, stiff or flexible. Interoception is increasingly seen as a crucial component of health by twenty-first century researchers, especially in how it bridges the gap between physical and emotional experience.  Recent research shows that well-developed interoception can lessen our experience of pain, which might surprise you.  In other words, the more we are in touch with our inner world of sensation, the more we can adapt our behaviors to lessen the causes of pain.  When our interoception is faulty and we are disconnected from the body, we are more vulnerable to anxiety and depression.

One way to check in with our interoception – our inner sense of subjective presence in the body – is with an inner dialogue. Think for a moment about whether you have an inner dialogue, a way of checking in with yourself throughout your day. If you do, what are its contours and themes? Do you talk to yourself with judgment, criticism, or disapproval? Or are you an encouraging coach for yourself? Does your body have a voice in the conversation? If your neck hurts and you are short-tempered, can you see the connection between those two states? Do you see your body as an ally, or as an adversary? A burden that you carry around, or your very own self?

I believe that we develop our inner dialogue over our lifetime. It is influenced by our family and by the culture we live in, the education we receive, the work that we do, and our goals for ourselves. I often ask students what they were taught about self-care while growing up. For many of us, it’s the usual short list: eat healthy food, get exercise, get enough sleep. Rarely is anything taught about the value of interoception or embodied self-awareness – the ongoing process of dialogue between your mental and physical selves. Being embodied with awareness requires practice and continuous renewal.

Bodymind Ballwork is a great way to develop your interoception and gradually build a more authentic and self-supporting inner dialogue.  If you haven’t tried it, now is a good time. I am offering several workshops this summer and fall to teach the full spectrum of this empowering and healing work. Check out the Bodymind Ballwork page and the workshop page of my website for more information. If you are already a practitioner, tell your friends about it!

Adapted and excerpted from The Bodymind Ballwork Method, pp 35-36.


Bodymind Ballwork for The Outer Side of The Legs

Right now, it’s the beginning of winter in the Northeast USA. We are wearing heavier clothing and shoes, the ground might be slippery, and the cold temperatures can sometimes cause muscles to tighten as we rush through our day. Tension in the outer legs that can cause hip, knee or ankle pain and fatigue.

Last year I wrote a blog about strengtheners for this part of the body, and today’s blog is about how to release tension there with the balls. While I acknowledge that many people use rollers for this, and get a lot of benefit, I prefer the balls, because I feel that the balls can get in between the layers and neighboring muscles really well, and they facilitate inner “glide” and healthy circulation.

Two of the techniques are done sitting on the floor, and the other two lying down. The balls can be purchased from www.lifesaball.org – look for the 4” spikey ball, and the 2.5” rainbow sponge ball, both of which I also sell at my studio. (Watch for the balls for sale from my website soon!)

1. Sitting with two 3-4” hollow balls: Begin by sitting with your legs spread to the side, and a ball under each buttock. Explore small movements with your pelvis to work on the muscles of the pelvic floor and lower buttocks.
Then stretch one leg to the side, bend the other one, and turn your upper body toward the bent leg. The ball will begin to move down your outer leg. You can lean over to that side to get more pressure if you wish. Make small slow movements to work on the outer thigh and the iliotibial band. Work for 5-10 minutes on one leg, moving the ball gradually down toward your knee, then repeat the same process on the other leg.


2. Sitting with one ball under the outer shin: For this you can use the hollow ball (for less pressure) or the solid ball (for more pressure). Sit with one leg bent and one leg straight out to the side. Place one ball under your outer shin. Lean over the bent leg and stabilize it with one hand on your knee and one on the ankle. Then slowly move your leg, moving the ball along the length of your outer shin muscles and fascia. Repeat on the other leg.


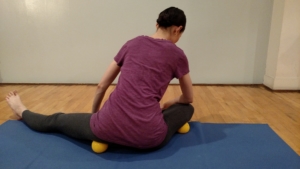
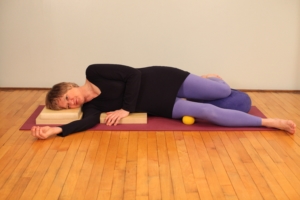
3. Lying on your side with one 3-4” hollow ball: Start by arranging props to support your upper body well while lying on your side. In this photo I have one pad under my ribs, two under my head, and a space between them for my shoulder.
Then place the ball under the side of the pelvis, where the iliotibial band begins. Your other leg can be behind, possibly on a bolster as shown here. Move your pelvis slowly forward and back to massage the muscles and fascia. Take your time, and stop in places that feel particularly tight.
Then move the ball a few inches down on the side of your thigh, skipping the bony prominence which is the greater trochanter of your femur. Work down the side of the thigh slowly, working on one spot at a time, moving the ball down with your hand when you’re finished with each spot. You can progress down to the side of the knee. Repeat on your other leg.


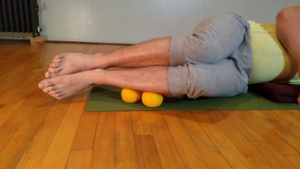
4. Lying on your side with two small solid balls under the side of your lower leg: Support your upper body in the same way as in #3 above.
Place the two balls under the outer shin of your bottom leg, and stack the other leg on top. You can start at the top and progress down toward your ankle. Move your legs slowly so that the ball works into the tibialis anterior and the peroneal muscles, and their associated fascia. You can roll the balls up and down, or across the outer shin. Improvise your movements to reach the places where you want the pressure.


For more fabulous ball techniques, check out my book The Bodymind Ballwork Method, published in October by North Atlantic Books.


Release Shoulder Tension with Bodymind Ballwork

This is one of the best stress-busters I know of.  Who doesn’t have tightness in the upper shoulders?   Working on a computer, carrying things or children, worrying, getting inadequate sleep, and having less-than-ideal posture—these all contribute to chronic contraction in the trapezius, a superficial muscle spanning your entire upper back and neck.  When you let go of tension here, with the help of balls, it does a huge service to your state of mind—not to mention helping to dissolve headaches and neck tension.

You’ll need two balls about the size of tennis balls (2-3” diameter), a place to lie on the floor, and a yoga block, if you have one. You might also want a bolster to rest your hands on, if your shoulders are tight, and a yoga mat for padding.

Lie on your back with the bolster above your head on the floor and the block near you. Take a moment to settle yourself, releasing unnecessary tension as much as possible while breathing fully. Notice how your shoulders feel.

Then place the balls under your upper shoulders, one on each side, in the area between the base of your neck and your shoulder blade. This is the upper trapezius, as well as some other deeper muscles. Bring your arms up in front of you and bend your elbows, pointing them toward the ceiling. This position brings more weight onto the balls and keeps them in place. You can rest your hands on your forehead or the floor behind your head.

There are two movements, each done very slowly and with awareness and care.  Notice as many details of sensation as you can. Don’t rush.  The benefit comes from the balls’ pressure on your tissues, the slow movement, and your attention.

Ballwork-shoulders_1500
1) Move your arms slowly up and down toward the ceiling, in a movement called protraction of the shoulder blades, which move away from the spine. Take special care to release your arms back to your rest position, feeling them settle onto the balls.  Do this for several minutes.


IMG_0259
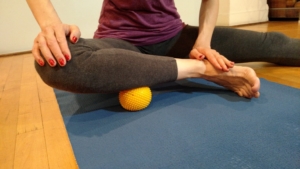
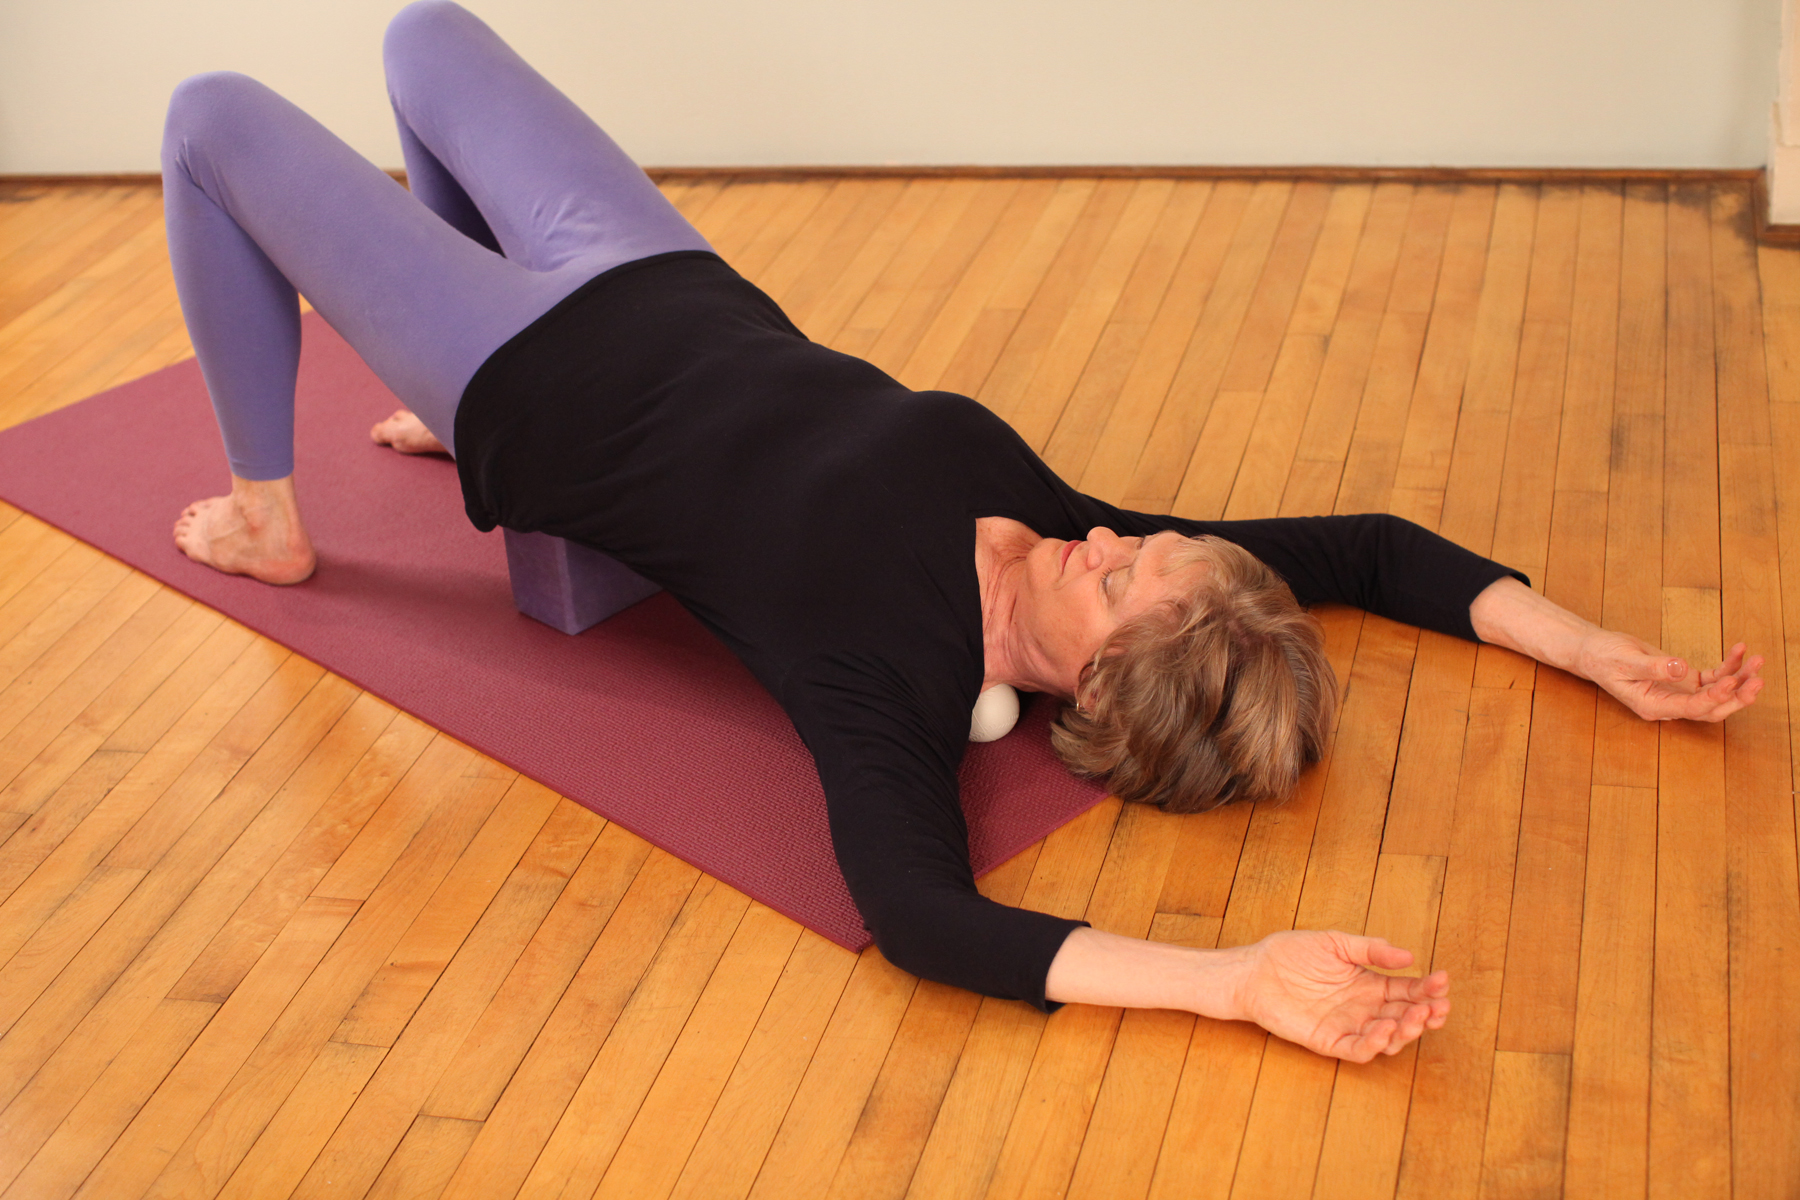
2) Extend your arms overhead, resting your hands on the bolster or on the floor. Settle in this new position, and feel the difference in sensation where the balls are. If they have slipped out of place, just reach back with one hand to reposition them.

Now move your shoulders and upper back slowly and carefully off to one side, shifting sideward rather than turning. Keep your weight on both balls if you can. It’s a small movement, just enough to work into the muscles laterally.  Return to center and repeat to the other side, and continue like this as long as you like.

Try this variation: place the block under your pelvis and feel how this changes the balls’ contact with your trapezius muscle. Then repeat #2, slowly moving from side to side to massage the muscle. If you find a trigger point, you can stay on that spot for a longer time, or go back and forth over it.  Be careful to keep your movements slow and steady.

After 5-10 minutes, remove the balls and feel your shoulders as you lie flat on the floor. Is there a change? What do you feel?  This is the beginning of the trapezius technique, which you can read more about in my upcoming book, Bodymind Ballwork.

If you have questions or want to tell me how it feels, please write me via the contact page. Look for another blog coming soon with essentials for shoulder alignment and strengthening.